The piano sustain pedal; a seemingly simple mechanism that unlocks a world of expressive possibilities. Yet, a poorly adjusted pedal can hinder your playing, resulting in unintended sounds and frustrating inconsistencies. From the subtle shimmer of a perfectly controlled release to the rich resonance of a sustained chord, the nuances achievable with the pedal are crucial for a pianist's artistry. A properly functioning pedal allows for seamless transitions between notes and a full realization of the composer's intent. More than just pressing down, mastering pedal technique involves understanding and adjusting the mechanism itself.
This comprehensive guide delves into the intricacies of piano sustain pedal adjustment, providing clear instructions and troubleshooting tips for both upright and grand pianos. We’ll move beyond basic understanding and explore common problems, offering solutions to address sticking, sluggishness, or uneven response. Ready to unlock the full potential of your piano's sustain pedal? Let's begin with our step-by-step guide to achieving perfect pedal control.
Safety Guidelines
- Always disconnect the piano from the power source before attempting any internal adjustments. Electricity and moving parts present a risk of shock or injury.
- If you are unsure about any step of the process, consult a qualified piano technician. Incorrect adjustments can damage your piano.
- Take photos or videos before disassembling any parts. This will be invaluable if you need to reassemble the mechanism correctly.
Methods: Adjusting Damper Lift for Even Sustain
Tools Needed
- Low stool
- Fingernail
- Appropriate wrenches
Step-by-Step Instructions
Initial Test for Even Damper Lift
- Lift all dampers with the sustain pedal.
- Using the back of your fingernail, get all the strings in the piano vibrating.
- Lower the dampers slowly with the sustain pedal.
- If the sound stops on all notes at the same time, your damper pickup is regulated properly.

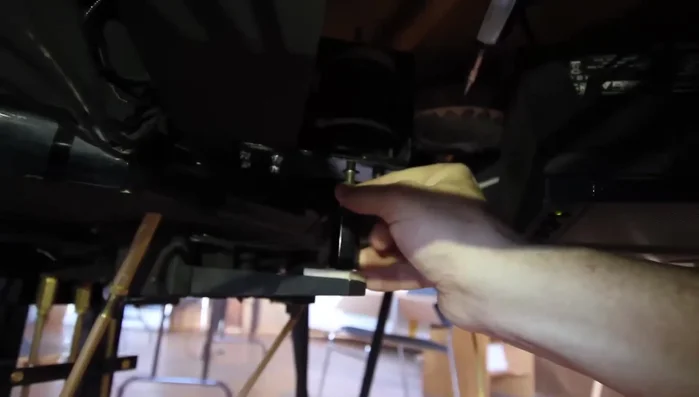
Initial Test for Even Damper Lift Identify Uneven Damper Lift
- If the dampers aren't lifting evenly, get a low stool to sit on and use the sustain pedal to move the damper tray.
- Observe which dampers aren't lifting with the others.
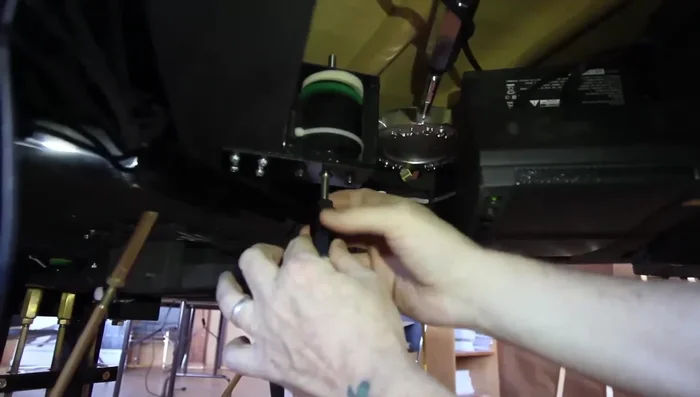
Identify Uneven Damper Lift Adjust Damper Lift Mechanism
- Adjust the damper lever pickup as required by the design of your piano's damper action.
Adjust Damper Lift Mechanism


Tips
- On Steinways and some old pianos, you may need to place shims between the pickup felt and the tray.
- On most other pianos, there will be a capstan or screw adjustment.
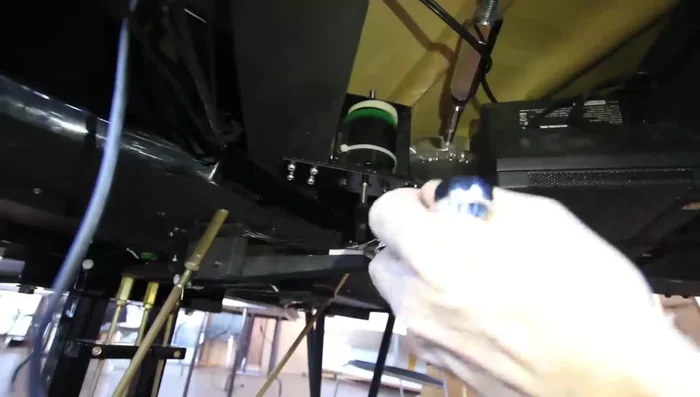
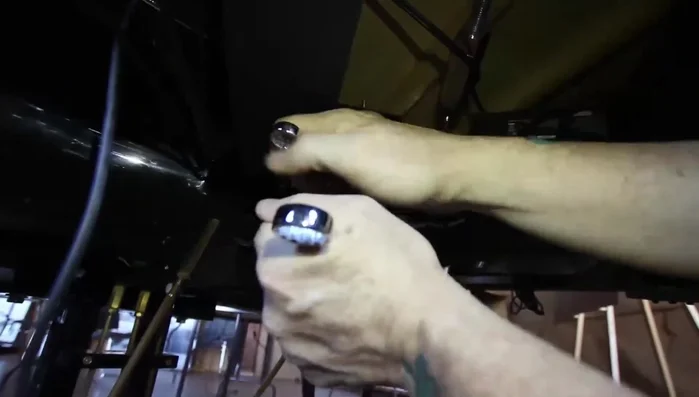
Methods: Adjusting Pedal Rod for Minimal Free Play
Tools Needed
- Appropriate wrenches
Step-by-Step Instructions
Prepare for Pedal Rod Adjustment
- Loosen the lock nut on the sustained pedal rod.
Prepare for Pedal Rod Adjustment Adjust Pedal Rod for Minimal Free Play
- Adjust the long cap nut until there is minimal travel before the dampers start to lift.
Adjust Pedal Rod for Minimal Free Play Check and Adjust Damper Pickup (if necessary)
- You may need to readjust the damper pickup if they aren't lifting evenly.
Check and Adjust Damper Pickup (if necessary)
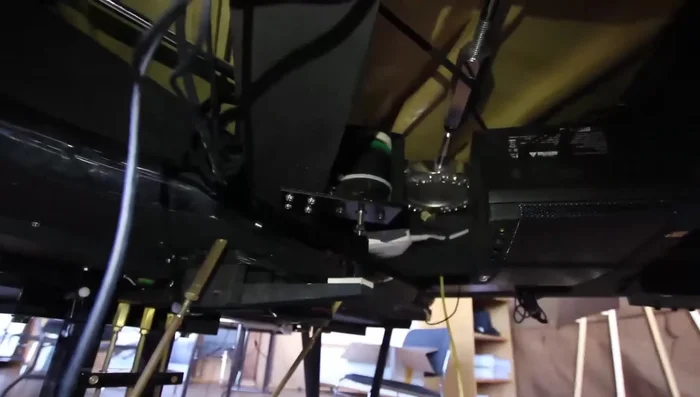
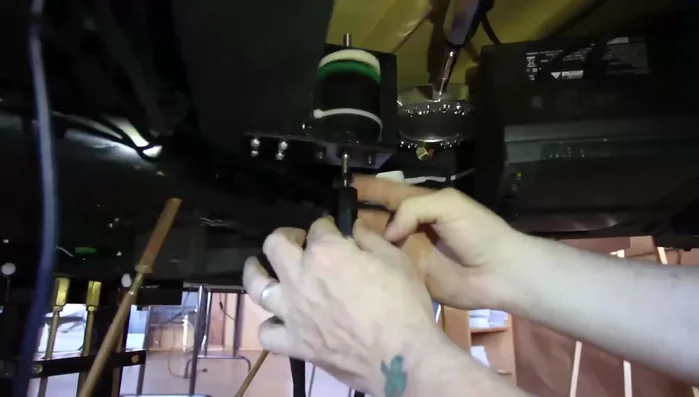
Methods: Adjusting Pedal Solenoid Stop Pad
Tools Needed
- Appropriate wrenches
Step-by-Step Instructions
Adjust Pedal Solenoid Stop Pad
- Loosen the lock nut.
- Turn the pedal solenoid stop pad clockwise (looking from the bottom) until it's as high as it will go.
- Tighten the lock nut.
Adjust Pedal Solenoid Stop Pad
Methods: Fine-Tuning Damper Lift with Load Damper Test
Tools Needed
- Load Damper Test Song
Step-by-Step Instructions
Initial Load Damper Test
- Play the load damper test song and observe the wedge damper lift.
Initial Load Damper Test Adjust Damper Lift
- Adjust the damper lift by turning the hex thrust nut (three-quarter inch adjustments).
- Counterclockwise gives more lift, clockwise gives less lift.
- When the lift is correct, tighten the lock nut.
Adjust Damper Lift