Transform your old piano bench from drab to fab with this easy DIY reupholstery project! This Cottagecore makeover breathes new life into a tired piece of furniture, perfectly complementing a modern-cottage home aesthetic. Following a simple step-by-step guide, you'll learn how to refresh your existing bench, saving money and adding a touch of personalized charm. This project is perfect for beginners with some basic crafting skills, demonstrating that even seemingly complex tasks can be surprisingly achievable. Get ready to unleash your creativity and enhance your home décor with this satisfying and budget-friendly DIY.This blog post details the complete process of reupholstering a piano bench, from choosing the right fabric to tackling the tricky corners. We'll walk you through selecting fabrics that enhance your existing décor, removing old upholstery, and securely attaching the new fabric with a staple gun. Discover a simple solution for neatly finishing the corners and reattaching the bench top perfectly. The final result is a beautifully reupholstered bench that adds a touch of cottagecore elegance to any home, proving that DIY home improvements can be both rewarding and surprisingly easy.
Read more: Top 5 Wooden Piano Benches
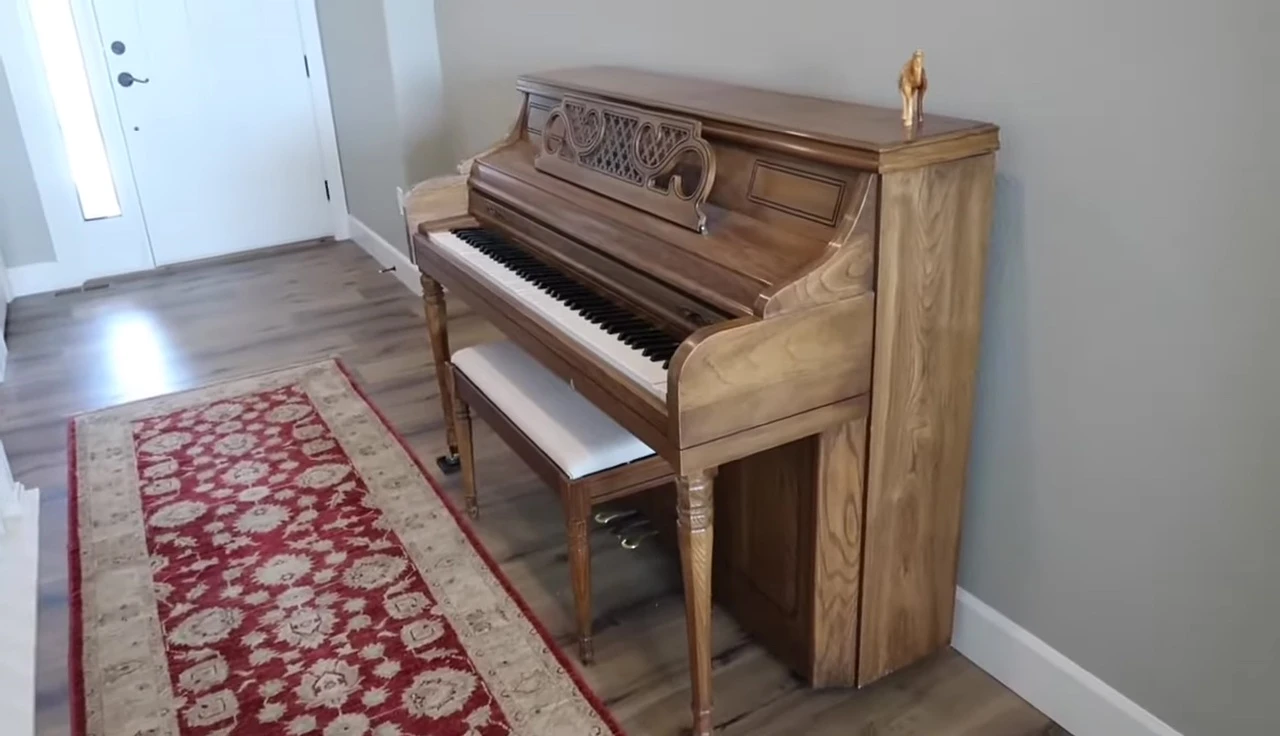
Project Inspiration & Goal
My old piano bench, previously upholstered in pink, didn't fit the cottagecore aesthetic of our new home. The house features grays and light greens, inspired by a cottage style but with a modern twist. I wanted to reupholster the bench with a fabric that complements our light green couches and gray accents, aiming for a cohesive and charming look.
This project aligns with my larger goal of becoming more self-sufficient and developing crafting skills. Reupholstering the bench allows me to recycle an existing piece and personalize our home's décor.
Fabric Shopping & Additional Purchases
I visited a fabric store, looking for light green or a similar greenish pattern. While there, I also found other materials for future projects, including gray and tan upholstery fabric options, a fabric for a niece's dress, and a cute sewing kit.
The unexpected purchases included cheesecloth (useful for homesteading and cooking) and other sewing supplies. My total spent was $60 thanks to a great coupon.
The Reupholstery Process
The initial fabric choice proved unsuitable. After trying several options, I selected a tan fabric with hints of brown and cream. While not perfect, it's a neutral choice that complements the existing décor, though the rug's darker shade than anticipated slightly limits the match.
The process involved removing the old fabric using pliers, revealing the bench's wooden base, foam padding, and fabric. I then cut the new fabric to roughly match the old fabric's dimensions, ensuring enough to fold over and staple.
Stapling & Finishing Touches
Using a staple gun, I carefully secured the new fabric to the bench's wooden base, ensuring the fabric was taut. The corners presented a slight challenge; I used a modified military fold to neatly finish them, cutting away excess fabric as needed.
Reattaching the bench top required precision, ensuring the hinges aligned properly. I propped the bench up to accomplish this and re-screwed the hinges back on, ensuring proper functionality.
Final Result & Conclusion
The final result is a successfully reupholstered piano bench that beautifully complements our new home's cottagecore style. The new fabric's neutral tones work well with the existing décor, offering a cohesive and improved aesthetic.
This project reaffirmed my crafting skills and reinforced the satisfaction of completing DIY home improvement projects. The project wasn't overly complex; previous experience helped. It highlights the achievable nature of simple home upgrades, even for beginners.