The grand piano, a majestic instrument capable of producing a breathtaking range of sounds, demands meticulous care to maintain its optimal performance. Its intricate mechanism, with hundreds of strings under immense tension, requires the expertise of a skilled piano tuner to ensure each note rings true and clear. This delicate balance is easily disrupted, affected by temperature fluctuations, humidity changes, and even the simple act of playing. A well-tuned grand piano not only enhances the musical experience but also protects the instrument itself from potential damage caused by uneven tension.
This guide provides a comprehensive, step-by-step approach to grand piano tuning, offering a glimpse into the meticulous work of a professional grand piano tuner. We'll explore the essential tools, techniques, and the precise procedures involved in achieving a perfect tuning, taking you through each stage from initial assessment to final voicing. Let's embark on this journey to understand the art and science behind keeping your grand piano in peak playing condition.
Preparation and Safety Guidelines
- Never attempt to tune a grand piano yourself unless you are a trained professional. Improper tuning can cause serious damage to the instrument.
- Always ensure the piano is in a stable and level position before beginning any tuning process. An uneven surface can affect the tuning and potentially damage the instrument.
- Wear appropriate safety glasses and gloves to protect against potential hazards like broken strings or flying debris during tuning.
Step-by-Step Instructions
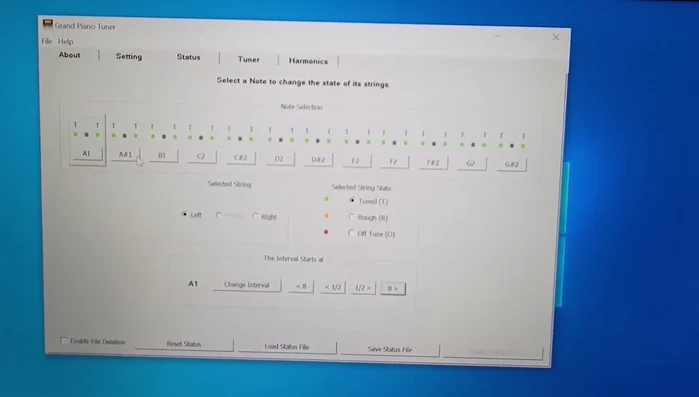
Prepare and Tune the First String
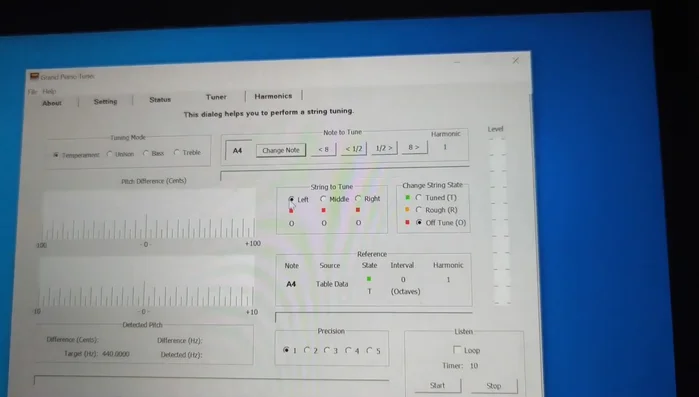
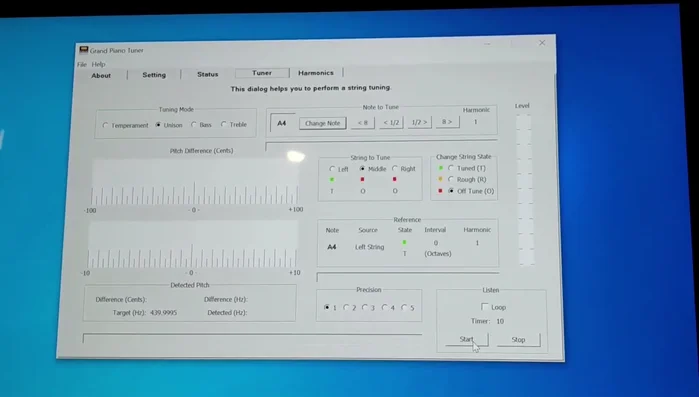
- Begin with the Temperament Octave (A3 to A4). Start with the left string of A4 for grand pianos, or the right string for upright pianos.
- Mute other strings in the choir to isolate the string you're tuning.
- Place the tuning lever head carefully and completely onto the proper pin.
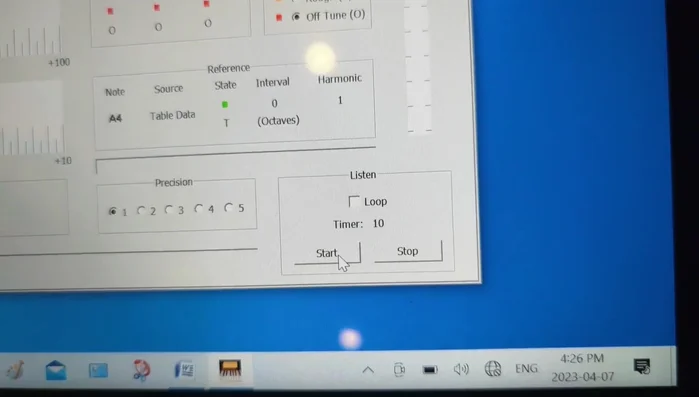
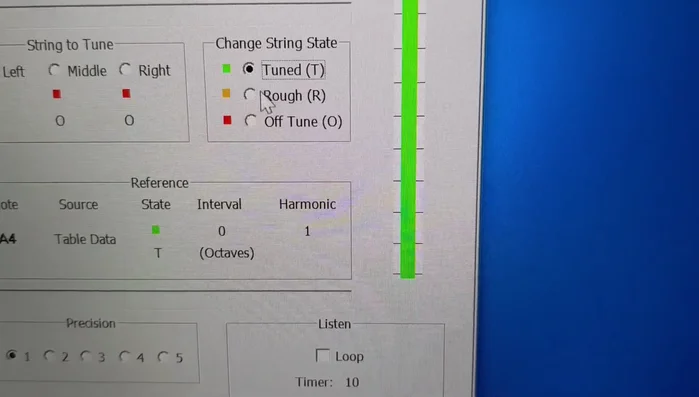
- Use the 'Loop Off' setting to check the current pitch. Strike the corresponding key (A4 in this case).

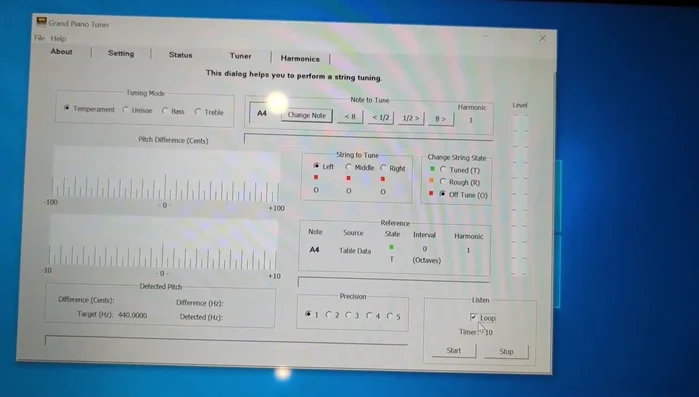
Prepare and Tune the First String - Adjust the string tension using the lever while monitoring the pitch using 'Loop On'. Aim for a pitch difference of zero.
- After adjusting, use 'Loop Off' again to verify the tuning accuracy.
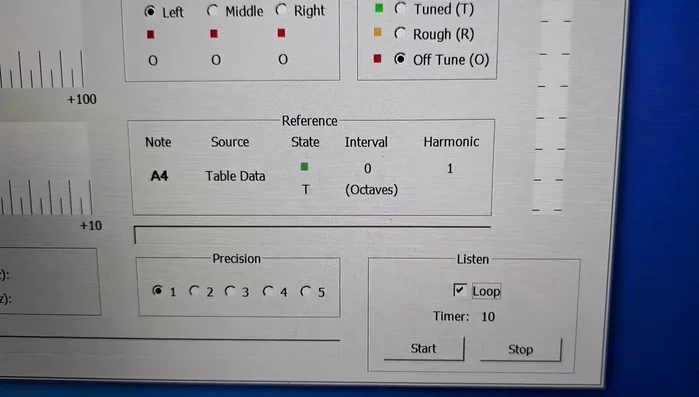
- Change the string state to 'Tuned' or 'Rough' in the application.
Prepare and Tune the First String Tune Remaining Strings in the Choir
- Tune other strings in the same choir using 'Unison' mode. At least one string in the choir should be tuned already.
- Repeat steps 4-7 for the other strings in the A4 choir.
Tune Remaining Strings in the Choir Complete the Temperament Octave
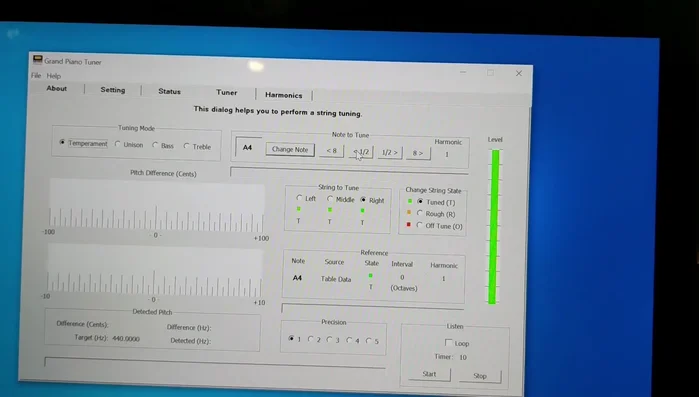
- Proceed to tune other notes (G#4, etc.) in the temperament octave, repeating steps 2-8. Change notes using the 'Change Note' button or navigation buttons.
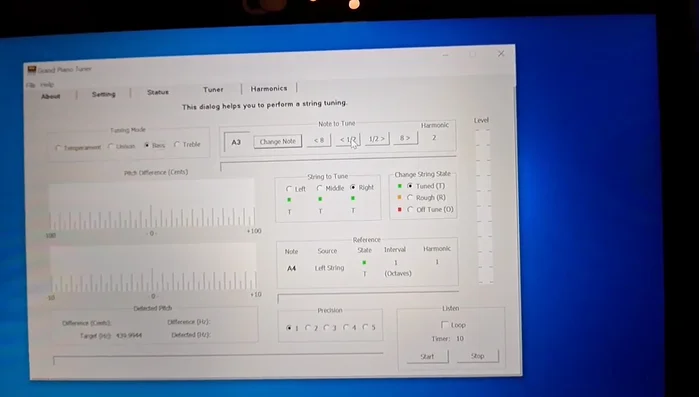
Complete the Temperament Octave Tune the Bass Section
- Tune the bass section (below A3). Switch to 'Bass' mode, and utilize the harmonics tab to adjust the ratios if necessary. Use the already tuned temperament octave strings as reference.
Tune the Bass Section Tune the Treble Section
- Tune the treble section (above A4). Switch to 'Treble' mode. Use the already tuned temperament octave and bass strings as reference.
Tune the Treble Section Final Check and Adjustments
- Check the status tab to ensure all strings are tuned. Make final adjustments as needed.
Final Check and Adjustments


Read more: How to Replace Piano Tuning Pins: A Step-by-Step Guide
Tips
- Always tune one string at a time.
- Keep the lever handle close to the line of the string for better control.
- Use Unison mode efficiently after tuning at least one string in the choir.
- Refer to the 'piano tuning sequence' in the user guide for detailed steps.
- Utilize the Harmonics tab to adjust harmonic ratios for more precise tuning, especially in the bass and treble sections.