The upright piano, a stalwart presence in countless homes and music rooms, relies on a complex and delicate mechanism known as the action to translate keystrokes into sound. Over time, this intricate system can become misaligned, leading to uneven touch, inconsistent tone, and frustrating playing experiences. Regular regulation is therefore crucial for maintaining the instrument's optimal performance and extending its lifespan. Understanding the nuances of piano action regulation can seem daunting, but with the right knowledge and tools, even amateur enthusiasts can achieve remarkable results.
This guide provides a comprehensive, step-by-step approach to regulating your upright piano action, empowering you to restore its responsiveness and musicality. We will cover key aspects of regulation, from hammer alignment and let-off adjustment to regulating the repetition lever and escapement. By following these detailed instructions, you'll be well on your way to enjoying the vibrant and satisfying sound your piano is capable of producing.
Preparation and Safety Guidelines
- Metric measuring tool
- Metric ruler
- Combination handle with flange screwdriver
- Regulation button adjustment tool
- Damper spoon adjustment tool
- Spring tool
- Pen tool
- Tweezers
- Capstan adjustment tool
- Key dip block (10mm)
- Wire bending tool
- Heat gun
- Straight piece of aluminum
- Paper punchings (various sizes)
- Always disconnect the piano from the power supply before beginning any work on the action.
- Use only the correct tools for the job to avoid damaging the delicate parts of the action. Improper tools can cause irreversible harm.
- If you are unsure about any step, consult a qualified piano technician. Improper regulation can lead to serious damage to the piano.
Step-by-Step Instructions
Initial Inspection and Preparation
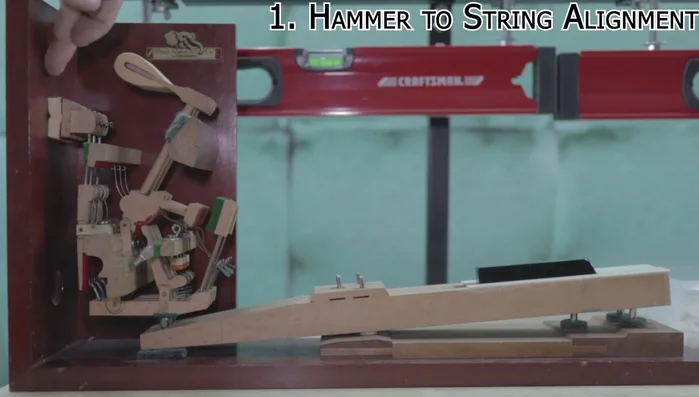
Hammer Alignment
- Ensure each hammer strikes the strings evenly, adjusting with a flange screwdriver if necessary. Use a heat gun to adjust hammer shank orientation if needed.

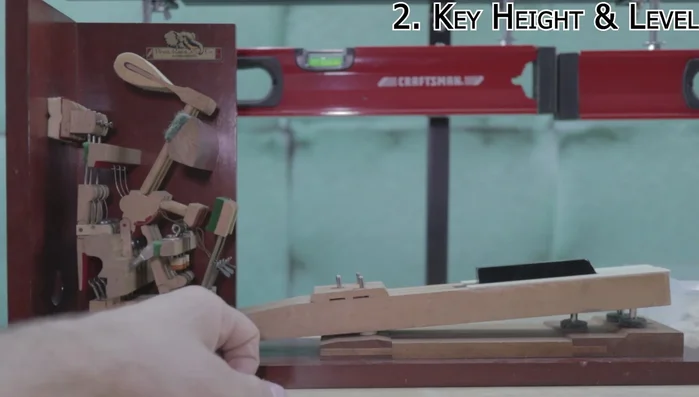
Hammer Alignment Key Height and Level
- Adjust key height to approximately 64-65mm from the key bed to the underside of the key cap using paper punchings and felt. Ensure levelness across the keyboard using a straight piece of metal.
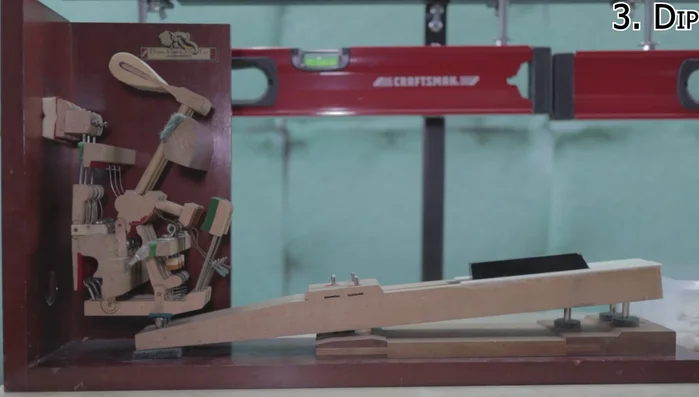
Key Height and Level Key Dip Adjustment
- Adjust the key dip to approximately 10mm using paper punchings and felt. The goal is to achieve good aftertouch.
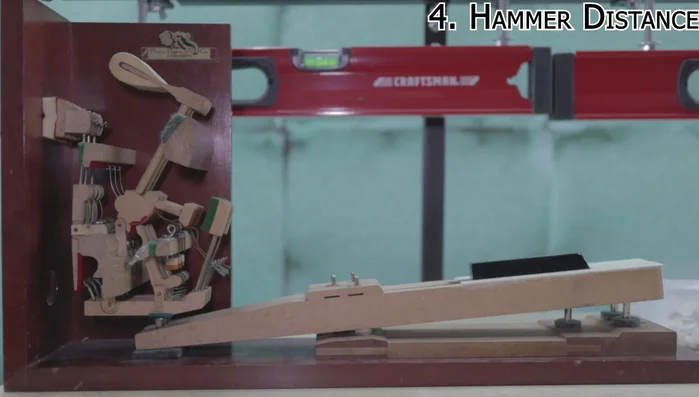
Key Dip Adjustment Hammer Distance and Lost Motion
- Adjust the distance between the hammer and strings to 42-46mm using felt shims under the hammer rail. Take up any lost motion (less than 1mm) using the capstan adjustment tool.
Hammer Distance and Lost Motion Let-Off Adjustment
- Adjust the let-off to approximately 2mm using the regulation button adjustment tool. This ensures a clean release of the key.
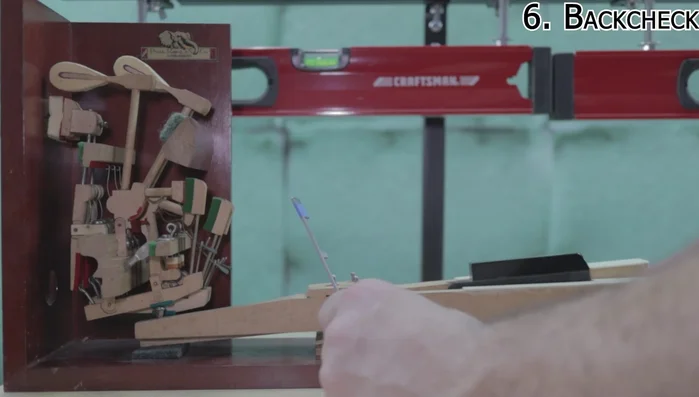
Let-Off Adjustment Back Check Adjustment
- Adjust the back check to approximately 15-16mm using the wire bending tool to adjust the back check spring. This controls the hammer's return after striking the string.
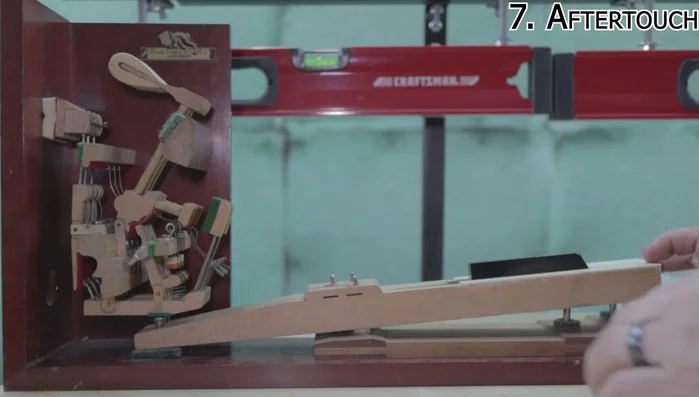
Back Check Adjustment Aftertouch Fine-tuning
- Fine-tune hammer distance and/or key dip to achieve proper aftertouch. The jack should clear the hammer butt by 4-5mm after a medium strike.
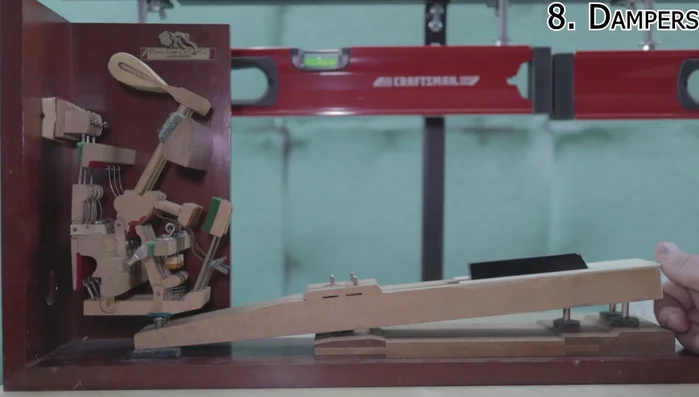
Aftertouch Fine-tuning Damper Adjustment
- Adjust damper lift using the damper spoon adjustment tool so that dampers start lifting approximately one-third to one-half of the way through the hammer's striking distance.
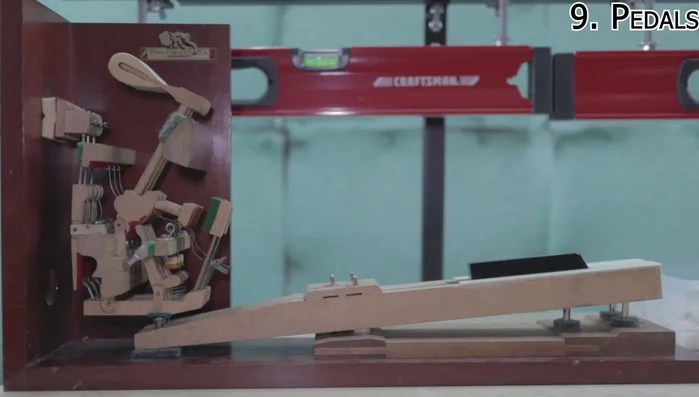
Damper Adjustment Pedal Adjustment
- Adjust pedal travel to minimize lost motion (3-6mm max). Check for alignment and proper function of the damper lift mechanism.
Pedal Adjustment Final Check and Lubrication
- Verify smooth operation and absence of squeaks, clicks, or other unwanted noises. Lubricate as needed.
Final Check and Lubrication


Read more: Increase Expression Pedal Sensitivity: Ultimate Guide
Tips
- Before regulating, inspect the action for damage, broken parts, or debris and clean it thoroughly.
- Use low heat when using the heat gun to avoid damage to the hammer shank.
- Always place felt on top of paper punchings to prevent wear and tear.
- Adjusting hammer distance and key dip can help achieve the desired aftertouch.
- CLP lube is a safe lubricant for piano parts.