Piano hinges, with their sleek, continuous line, offer a sophisticated and robust solution for a variety of woodworking projects, from elegant cabinets to sturdy chests. Their seemingly complex installation, however, often deters even experienced woodworkers. But fear not! The process is far simpler than it initially appears, requiring only a few basic tools and a methodical approach. Achieving perfectly aligned, flawlessly functioning piano hinges is within everyone's reach, transforming potentially frustrating projects into satisfying achievements.
This guide will demystify piano hinge installation, providing you with clear, concise instructions and helpful tips to ensure a professional finish every time. Forget wrestling with misaligned hinges and frustrating gaps – prepare to master this technique with confidence. Let's dive into the step-by-step process, guiding you through each stage from accurate marking to final tightening.
Preparation and Safety Guidelines
- Wood
- Screwdrivers
- Hacksaw
- Drill
- Drill bits (5/64" and smaller)
- Clamps (jaw clamps or spring clamps)
- Measuring tape
- Pencil
- Green tape
- File
- Always use the correct size hinge for your application. Using a hinge that's too small can lead to instability, while one that's too large can cause damage to the wood.
- Pre-drill pilot holes to prevent wood splitting, especially in hardwoods. The pilot hole should be slightly smaller than the hinge screw shank.
- Use a clamp to hold the door or lid in place while screwing in the hinges to ensure proper alignment and prevent misalignment.
Step-by-Step Instructions
Marking and Preparation
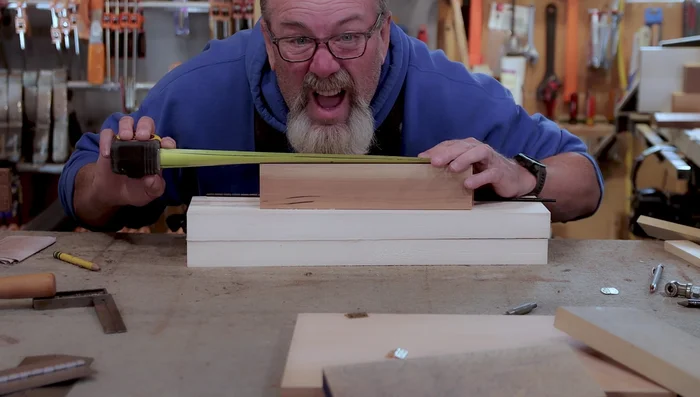
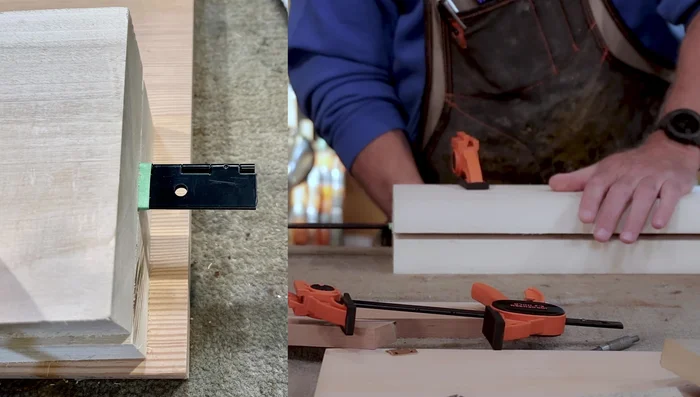
- Measure and mark the wood where you want to install the hinge. Leave a 1/16" to 1/8" gap on either side.
- Use green tape to mark the hinge's placement on the wood. The smooth side of the hinge faces the wood.

Marking and Preparation Cutting the Hinge
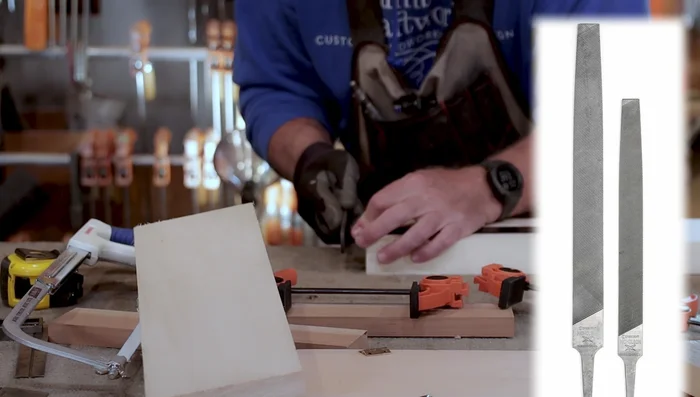
- Carefully cut the hinge to the desired length using a hacksaw. Avoid applying too much pressure to prevent damaging the hinge's finish.
- Clean up any imperfections on the cut hinge using a file.
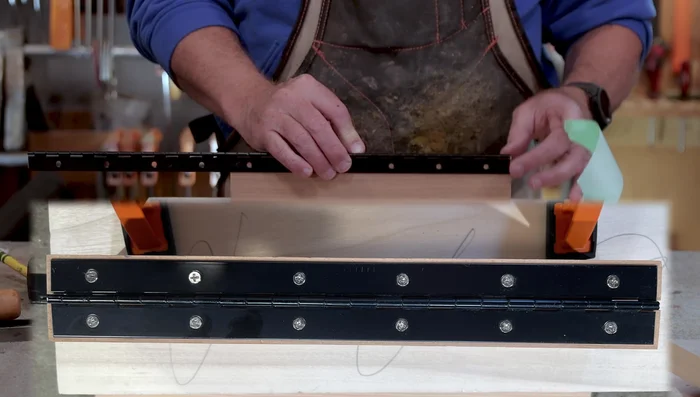
Cutting the Hinge Positioning and Pre-Drilling
- Clamp the hinge to the wood, ensuring it's aligned with the green tape.
- Position the hinge between the two pieces of wood, ensuring the barrel is facing outwards and the hinge is flush against the wood. Maintain an equal 1/16" gap on either side.
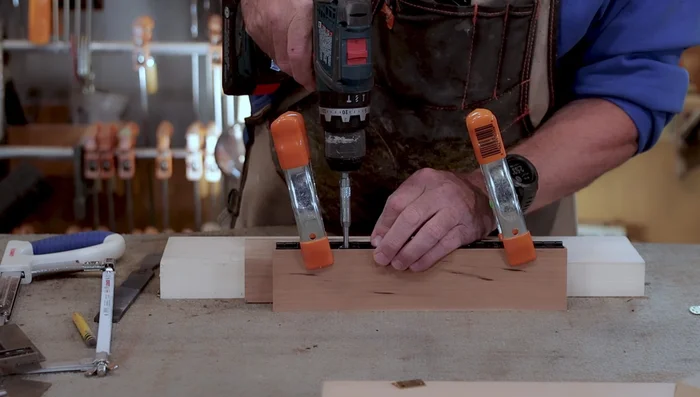
- Use a centering bit (5/64" or smaller for smaller hinges) to pre-drill pilot holes for the screws. Ensure the bit is centered and flush against the wood to guarantee accurate screw placement.
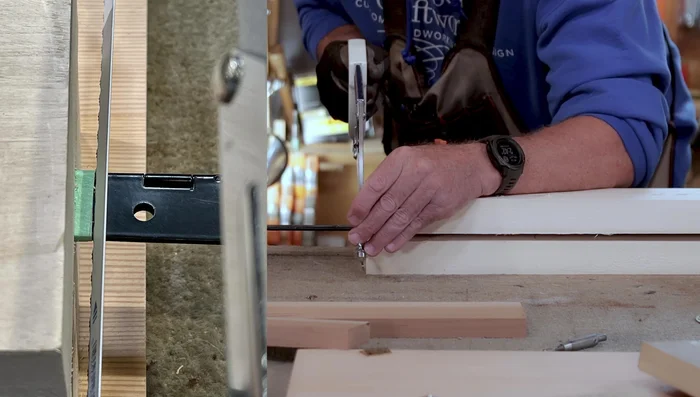
Positioning and Pre-Drilling Securing the Hinge
- Securely attach the hinge to both pieces of wood using appropriate-sized screws. Avoid over-tightening.
Securing the Hinge


Read more: Antique Piano Stool Restoration: A Complete Guide
Tips
- Ensure the tapered side of the hinge (where the screw holes are) is facing outwards and the flat side is against the wood. Don't install the hinge upside down.
- Use green tape to accurately mark the hinge placement and ensure precise cutting.
- Use a centering bit to pre-drill pilot holes for accurate screw placement and prevent wood splitting.
- Use screws that are the appropriate size and length, ensuring the screw heads do not protrude above the hinge surface.
- For larger or heavier hinges, offset the screw holes (e.g., 3/8" from either side) for increased strength and prevent weakening the center of the wood.