The elegant simplicity of a piano bench often belies its surprisingly delicate construction. A common problem, particularly with older or frequently used benches, is the development of unsightly and potentially unstable lateral breaks – cracks or separations running along the sides of the seat or frame. These breaks can range from minor cosmetic issues to serious structural weaknesses, making the bench uncomfortable and even unsafe to use. Ignoring these problems can lead to further damage and ultimately, the need for costly repairs or replacement.
Fortunately, many lateral breaks can be successfully repaired at home with basic tools and a little patience. This ultimate guide will equip you with the knowledge and techniques to diagnose the problem, select the appropriate repair method, and expertly restore your piano bench (or similar furniture piece) to its former glory. Ready to get started? Let's dive into the step-by-step repair process now.
Preparation and Safety Guidelines
- CA glue (two-part cyanoacrylate glue)
- Accelerator
- Drill bits (1/8 inch and 3/8 inch)
- Hardwood dowel (oak)
- Japanese pull saw
- Wood glue (Taipan)
- 220 sandpaper
- Wood filler
- Mohawk pre-catalyzed aerosol lacquer
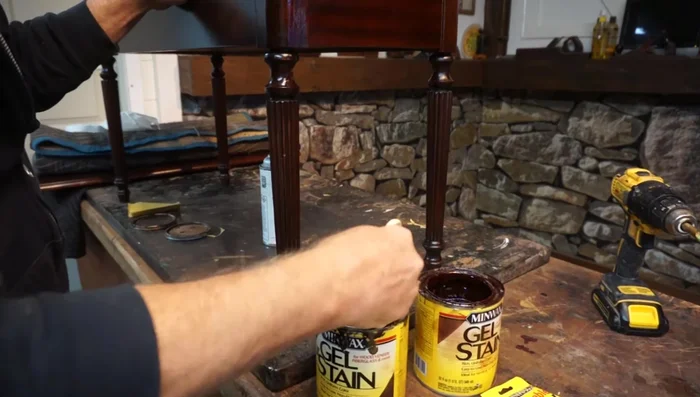
- Minwax gel stain (coffee and mahogany)
- Brush
- 50-pound weight
- Always prioritize safety. Wear safety glasses and gloves to protect yourself from splinters and flying debris. If unsure about any step, consult a professional.
- Support the bench adequately while making repairs. Never work on a weakened structure without proper support to prevent further damage or injury.
- Use appropriate tools for the job. Using the wrong tools can cause more damage and potentially lead to injury.
Step-by-Step Instructions
Prepare the Broken Leg
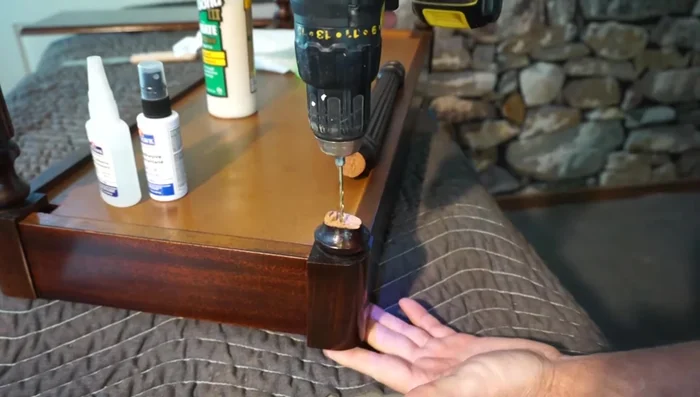
- Drill a 1/8 inch pilot hole as close to the center of the break as possible.
- Flush cut the broken piece of the leg using a Japanese pull saw.

Prepare the Broken Leg Reattach the Broken Piece
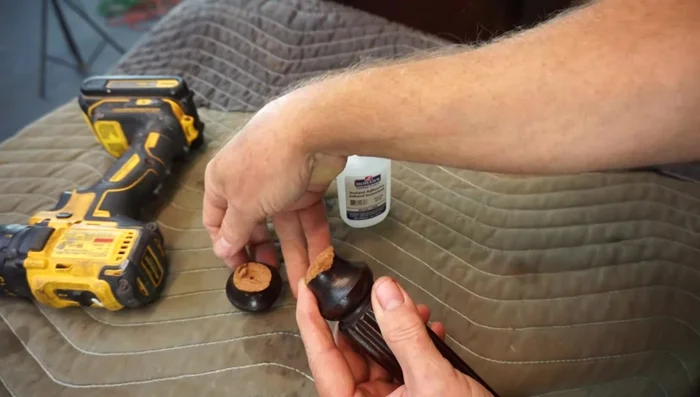
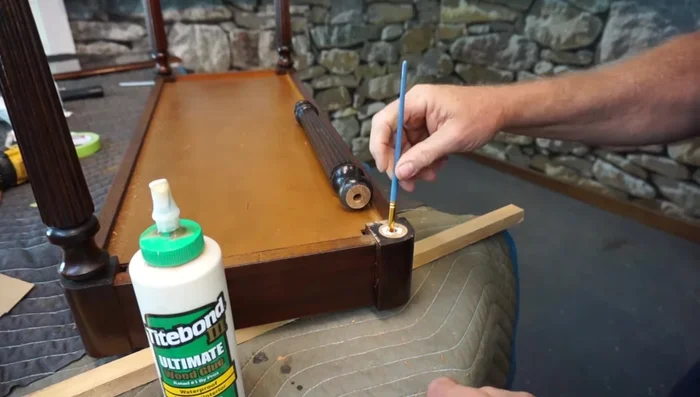
- Apply CA glue to one broken surface and activator to the other. Assemble, applying pressure for about 10 seconds.
Reattach the Broken Piece Drill and Expand Holes
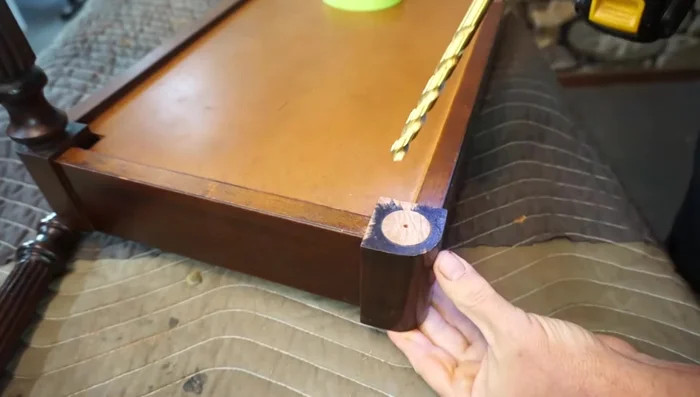
- Enlarge the 1/8 inch pilot hole to 3/8 inch using a 3/8 inch drill bit, ensuring it extends beyond the break on both the leg and the bench base.
Drill and Expand Holes Prepare and Insert the Dowel
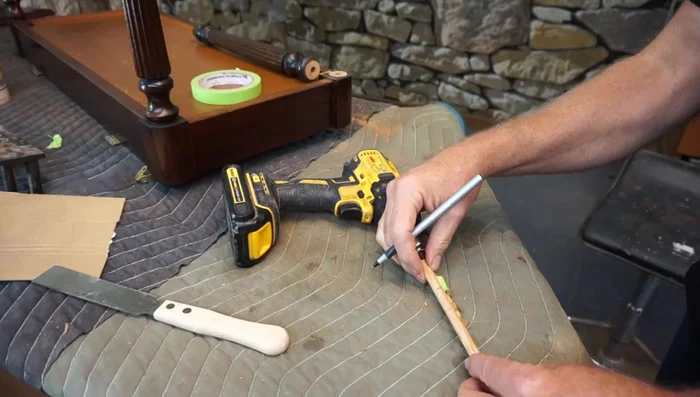
- Cut a hardwood dowel to the appropriate length (slightly shorter than twice the depth of the 3/8 inch holes). Create notches in the dowel to improve glue adhesion.
- Apply wood glue to the 3/8 inch holes on both the leg and the bench base. Insert the notched dowel, ensuring a firm fit.
Prepare and Insert the Dowel Secure the Repair
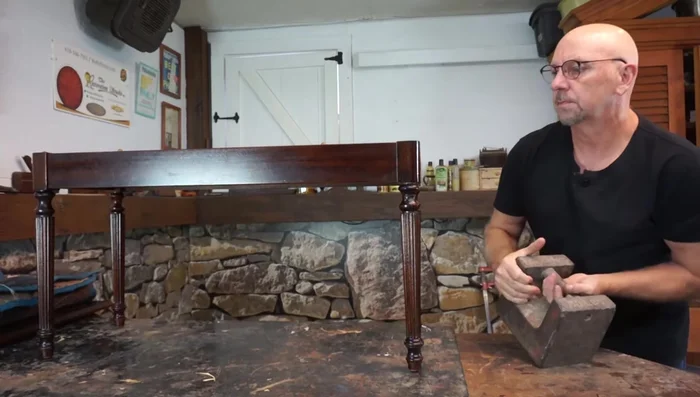
- Apply weight (50 pounds) to the repair overnight to hold it in place while the glue dries. Avoid using clamps, as they may distort the leg.
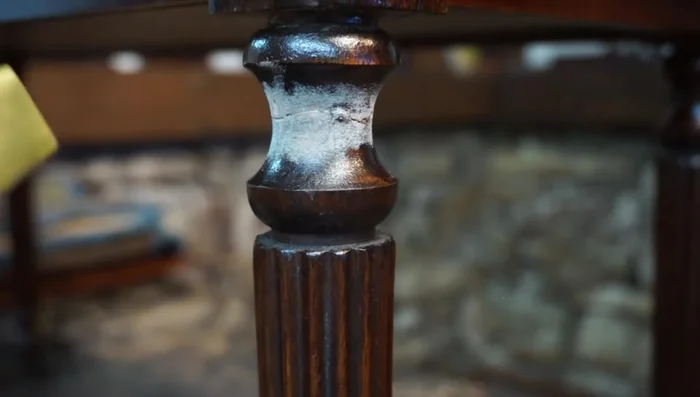
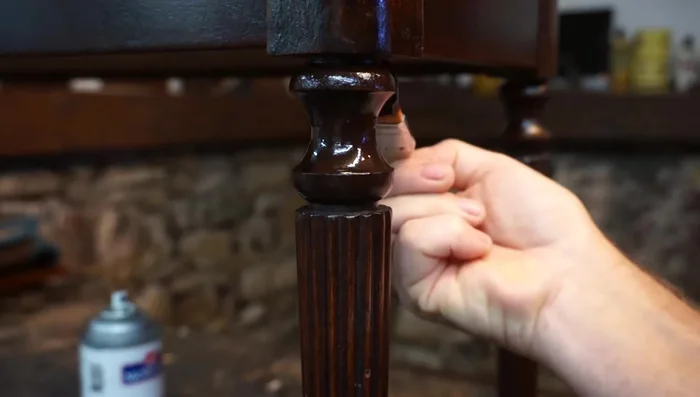
Secure the Repair Sand and Fill
- Sand the repair smooth using 220 sandpaper. Use wood filler if needed.
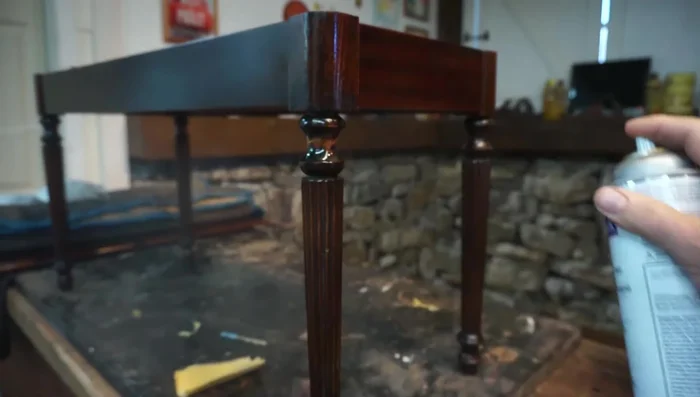
Sand and Fill Apply Lacquer Base Coat
- Apply three to four coats of aerosol lacquer to build a base coat. Let it dry before applying gel stain.
Apply Lacquer Base Coat Apply and Blend Gel Stain
- Apply a mixture of gel stains (in this case, coffee and mahogany) to match the original color, feathering it out to blend seamlessly with the surrounding wood.
Apply and Blend Gel Stain Apply Final Lacquer Coats
- Once the gel stain dries, apply two more coats of aerosol lacquer to achieve the final finish.
Apply Final Lacquer Coats
Read more: Antique Piano Stool Restoration: A Complete Guide
Tips
- Using a Japanese pull saw allows for a clean, flush cut which is crucial for a strong repair.
- Pre-fitting the pieces before gluing ensures accurate alignment and minimizes working time with the fast-setting CA glue.
- Pre-marking the drill bit helps ensure the hole is drilled deep enough to extend beyond the break for enhanced strength.
- Using weight instead of clamps prevents distortion of the leg during the drying process.
- A combination of gel stains can be used to achieve a precise color match for the repair.